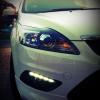
Haz93 Posted September 16, 2012 Share Posted September 16, 2012 As promised, here is a guide for fitting the submarine, ST style lights to the interior map light unit. Please note, I will not be held responsible to any damage you may make to your car when following this guide. Guide to fit Submarine Lights.pdf I managed to complete this without breaking or scratching any parts of my car, so remember to take your time and if you need any advice please PM me 2 Quote Link to comment Share on other sites More sharing options...
Preee Posted September 16, 2012 Share Posted September 16, 2012 Great guide Haz . Really nicely layed out and clear to follow. 1 Quote Link to comment Share on other sites More sharing options...
Oxide Posted September 16, 2012 Share Posted September 16, 2012 Great guide, a bit intense for me atm but I will certainly be looking into this later on. 1 Quote Link to comment Share on other sites More sharing options...
Stoney871 Posted September 16, 2012 Share Posted September 16, 2012 It's a Doddle. Buy the light with the led's already fitted. Swap lights and run one wire to connection 16 on the headlight switch. If a thicko like me can do it then anyone can. :D Excellent guide. 1 Quote Link to comment Share on other sites More sharing options...
Haz93 Posted September 16, 2012 Author Share Posted September 16, 2012 Thanks guys, took me a while to put it all together :) As the total cost of this for me was £3 at the time it is defo worth it, or as Stoney said, if your not up for too much of a challenge just get a unit already set up and just run the wire :) 1 Quote Link to comment Share on other sites More sharing options...
Stoney871 Posted September 16, 2012 Share Posted September 16, 2012 The ready to go units aren't cheap but are so much easier especially if you're a ham fist like me. Quote Link to comment Share on other sites More sharing options...
SkinnyB Posted October 27, 2012 Share Posted October 27, 2012 Great guide Haz, I've always been a big fan of submarine lights from the time of my BMW E39, it had them as standard. Right done this mod about a week ago. Easy enough if u follow Haz's guide. Can't wait to take the car on a drive at night with them on, car is currently off road, hopefully should be back on road by late next week at the latest. Will try and put a picture or two up. 1 Quote Link to comment Share on other sites More sharing options...
Haz93 Posted October 28, 2012 Author Share Posted October 28, 2012 Thanks, glad you found the guide useful :) Got to say the 12v 3mm super bright LEDs I have aren't that bright, not sure how yours are or which LEDs you chose. I may swap mine for 5mm superbrights as they supposedly have 2X the brightness :) 1 Quote Link to comment Share on other sites More sharing options...
SkinnyB Posted October 29, 2012 Share Posted October 29, 2012 Definately found it useful , yea I got the same 3mm super bright (the guy from maplins told me) as you and I have same problem. I just don't think they are bright enough, I don't want them too bright illuminating everything but these ones I have just ain't doing it for me. They look amazing though I have to admit. Haz u got me thinking about these 5mm now :), do you recon you will be swapping the 3mm for the 5mm? 1 Quote Link to comment Share on other sites More sharing options...
Lenny Posted July 28, 2013 Share Posted July 28, 2013 It's a Doddle. Buy the light with the led's already fitted. Swap lights and run one wire to connection 16 on the headlight switch. If a thicko like me can do it then anyone can. Excellent guide. Great Guide,And Connection 16 That's brilliant information, I've made up a single feed cable with an insulated female spade connector crimped on to the end, I'm going to run it up the drivers side A Pilar in to the interior light section then splice it in to cable 16 at the rear of the light switch unit, Then I'll just have to un-package and plug in the sub light unit when it arrives next week. Quote Link to comment Share on other sites More sharing options...
Stoney871 Posted July 28, 2013 Share Posted July 28, 2013 Bear in mind that the bayonet connector is tiny (4-5mm). Quote Link to comment Share on other sites More sharing options...
Lenny Posted July 28, 2013 Share Posted July 28, 2013 On Sunday, July 28, 2013 at 6:26 PM, Stoney871 said: Bear in mind that the bayonet connector is tiny (4-5mm). Got it sorted mate, The red connector I've fitted to the cable; slides on to the spades of the existing unit no problem so I assume the extra connector on the ambient unit is the same size, Cable is now in place and spliced to the bottom left cable on the rear of the light switch unit coloured I've tested it out and yes it becomes live when the driving lights are turned on. I've taken the front light unit out now and swapped it with the single bulb unit in the back seat, So now back seat passengers have a reading light on either side aswell as a courtesy light in the centre. Was a straight swap all cables are there. 1 Quote Link to comment Share on other sites More sharing options...
calllumallan Posted November 22, 2016 Share Posted November 22, 2016 Great Guide! I ended up getting a ST interior lights with the LEDs already in from a breaker yard for about £10. cable in but need to get some connectors tomorrow. Look forward to it 2 Quote Link to comment Share on other sites More sharing options...


Recommended Posts
Ford UK Shop
Sponsored Ad
Name: eBay
Ford Model: FordUK Shop
Ford Year: 2024
Latest Deals
Ford UK Shop for genuine Ford parts & accessoriesDisclaimer: As the club is an eBay Partner, The club may be compensated if you make a purchase via the club
Join the conversation
You can post now and register later. If you have an account, sign in now to post with your account.